Today I wanted to share my newly hand-wired Preonic keyboard.
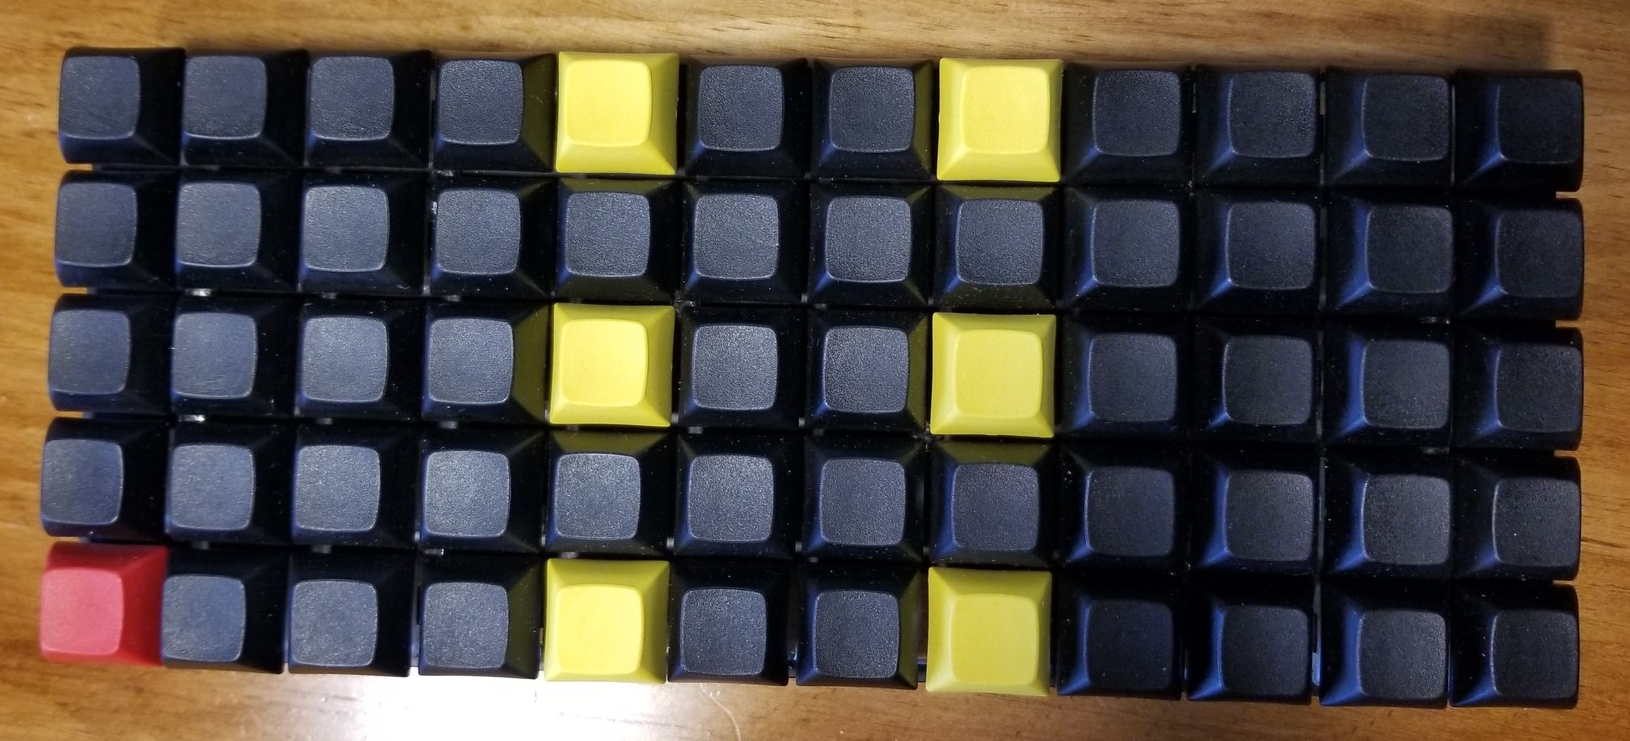
Below is the final result, equipped with Gateron Black switches.
Since this is a more involved project, I’ve included a bunch of build process images.
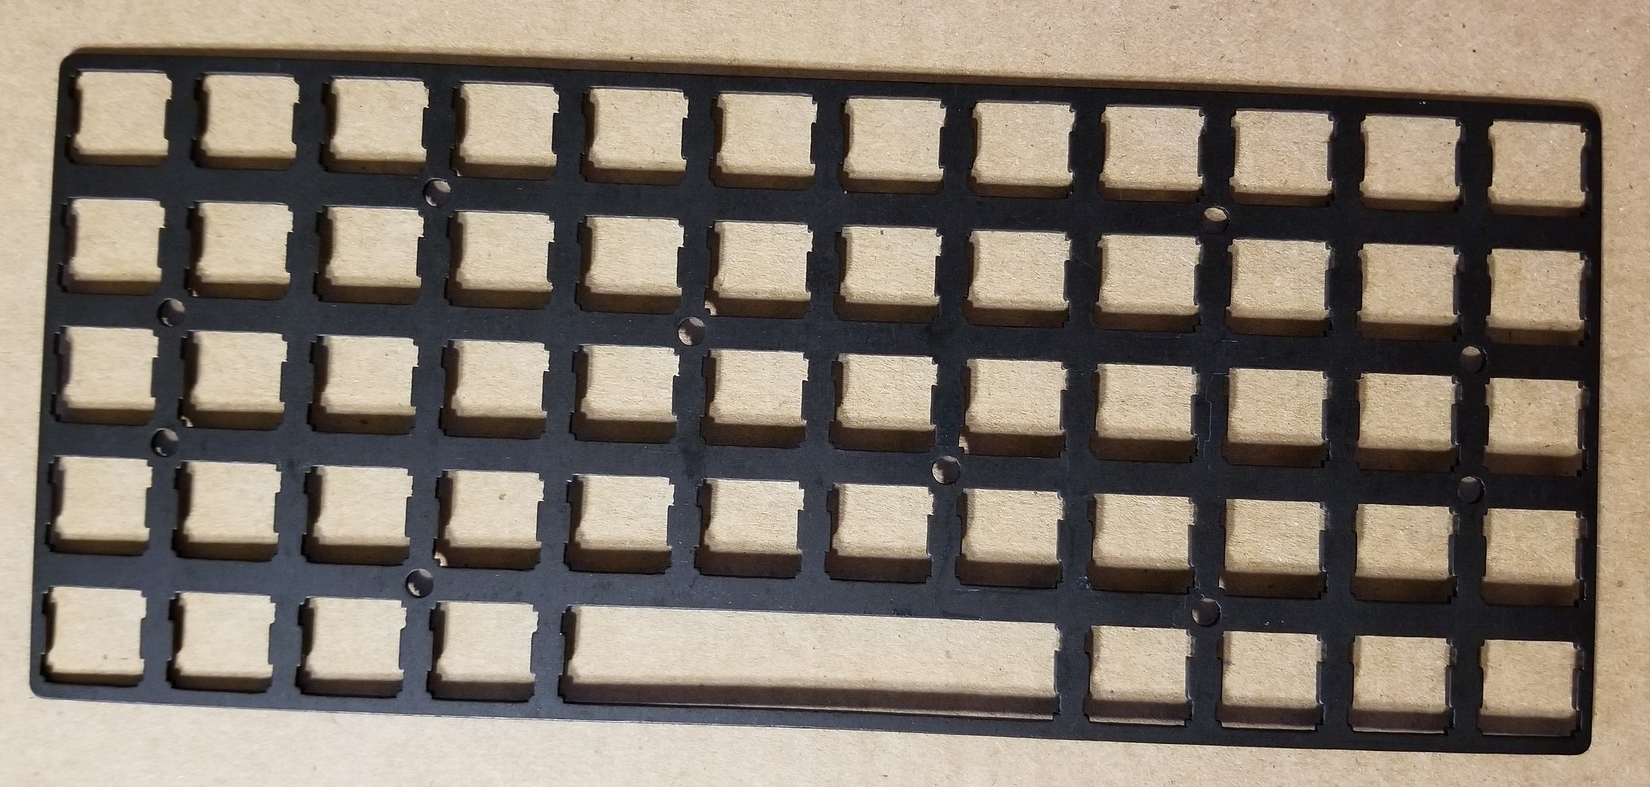
The journey started when I picked up a Preonic top plate from OKLB, but no PCBs were available. This felt like the perfect opportunity to learn how to hand-wire a keyboard. Luckily there are a couple good guides out there: QMK Handwire, trauring.org. I used these plus a couple other random resources to put this one together.
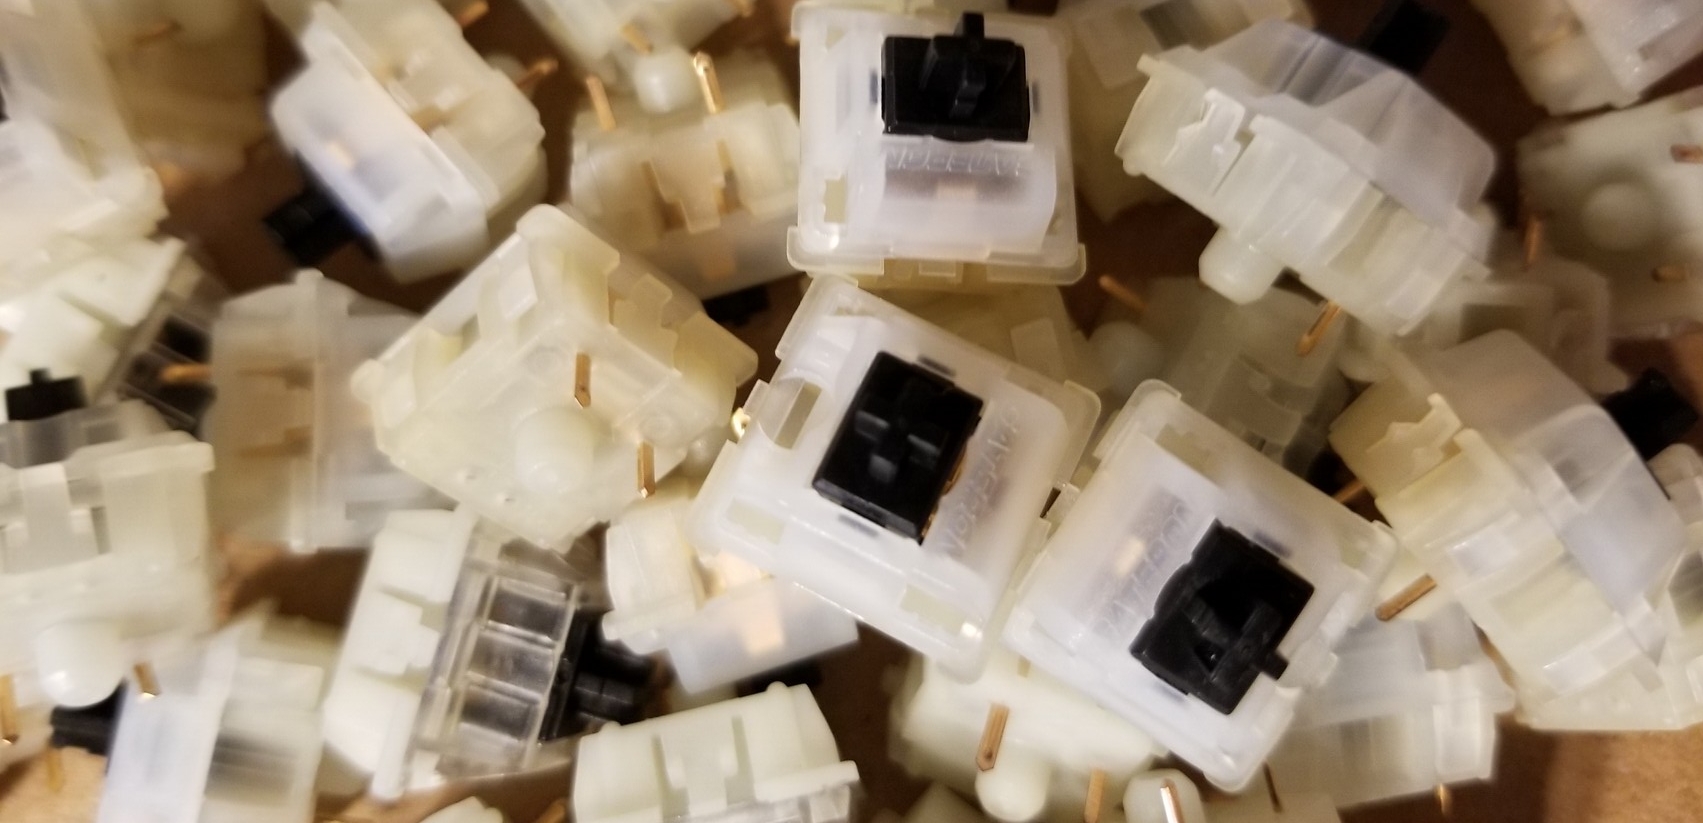
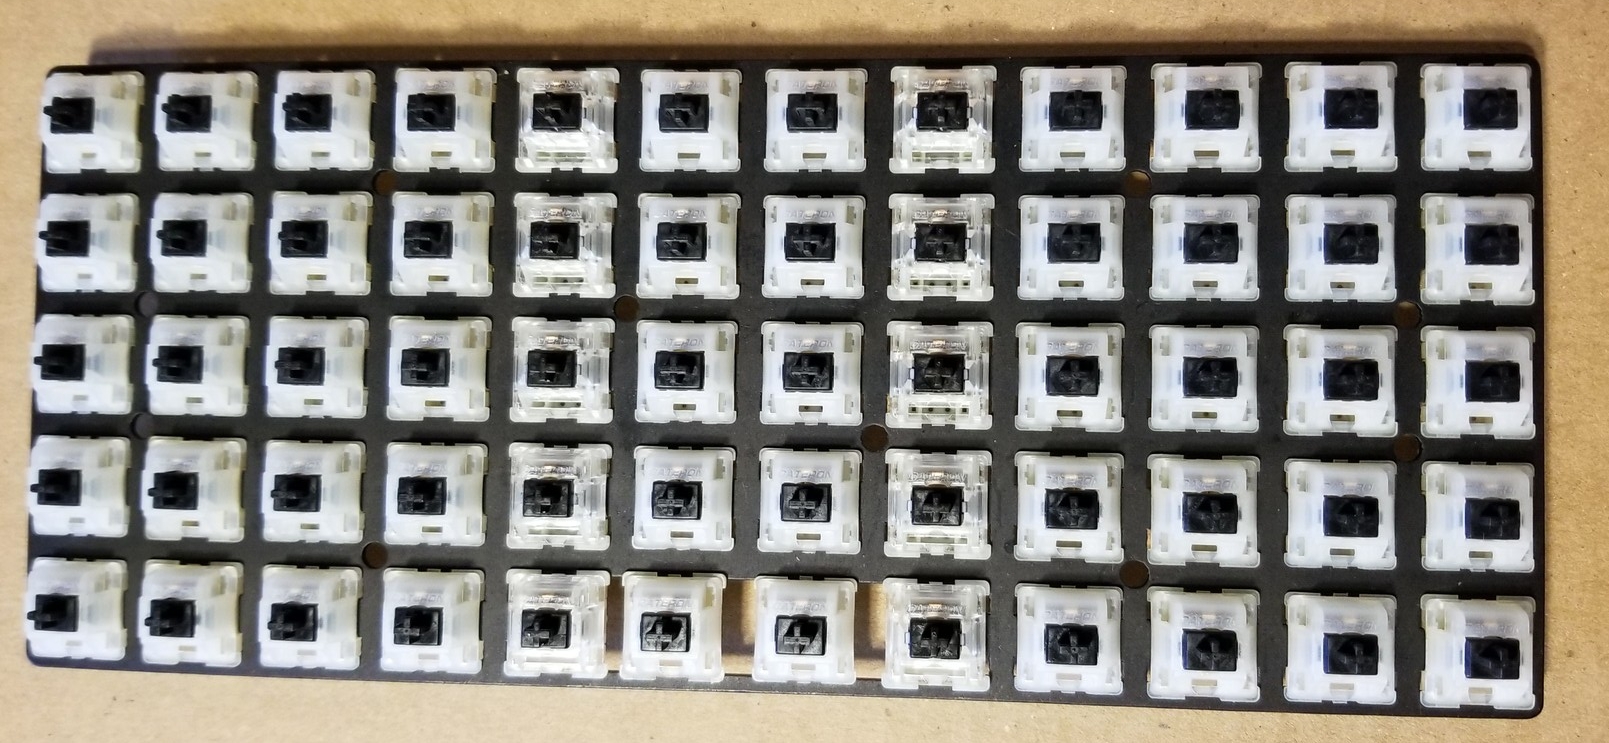
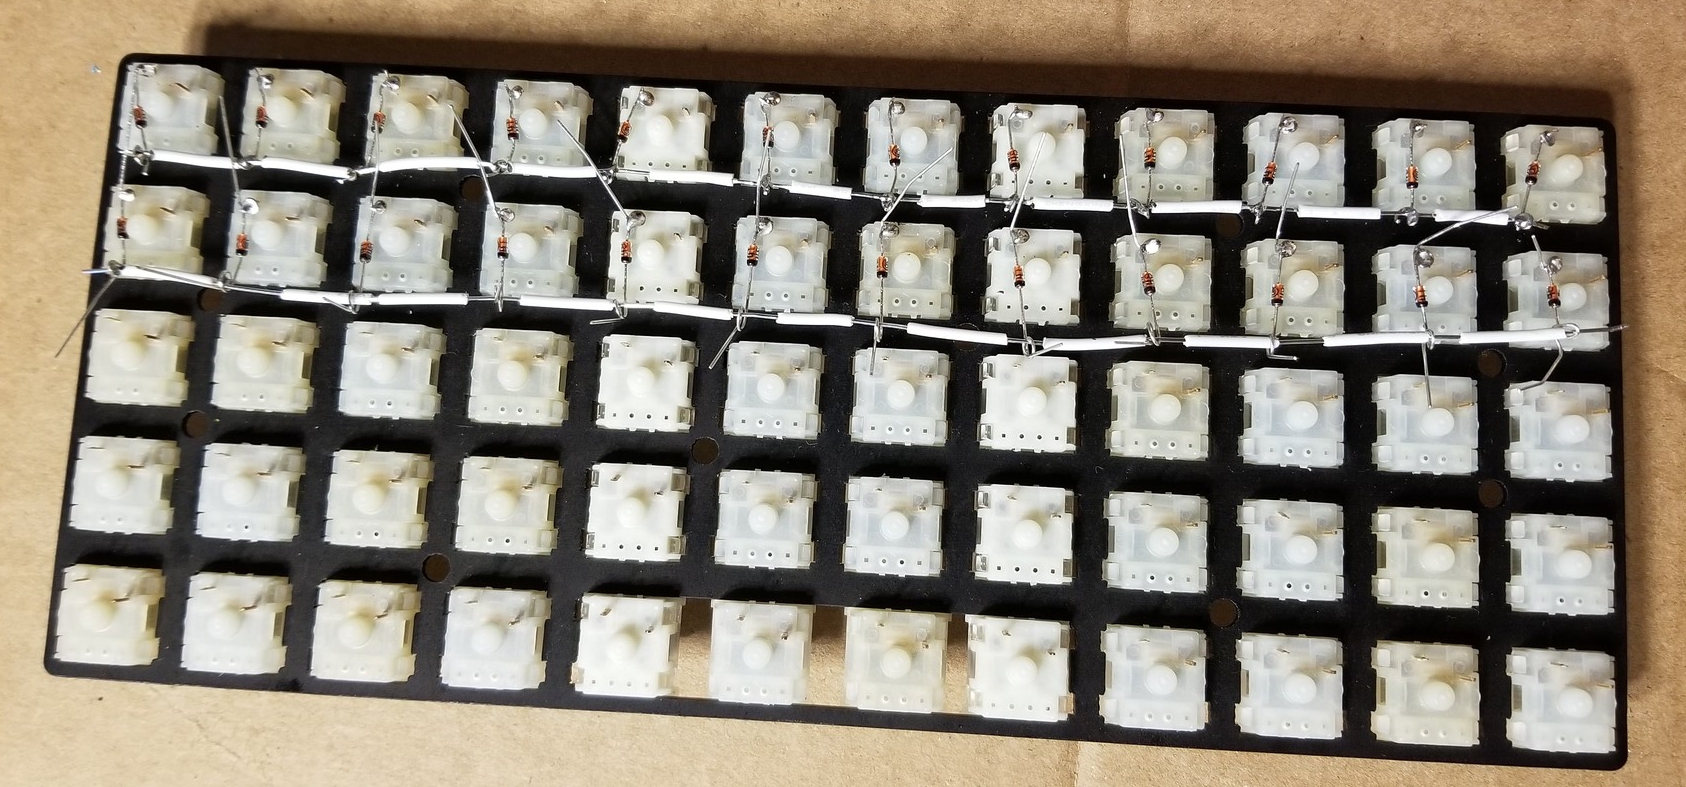
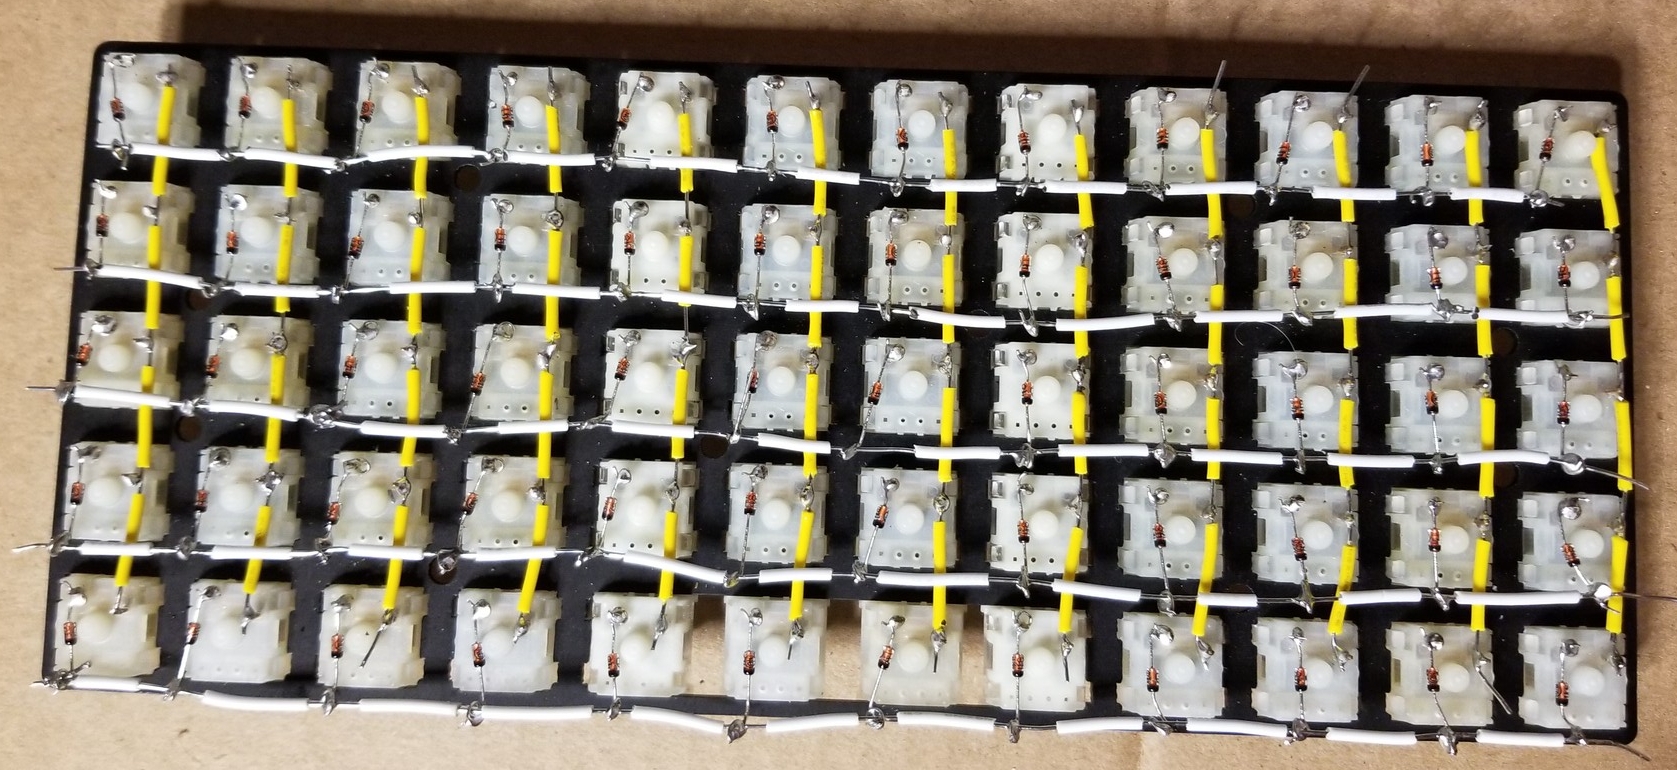
In the beginning, there were switches and a plate. Mounting the switches seems like a good starting point.

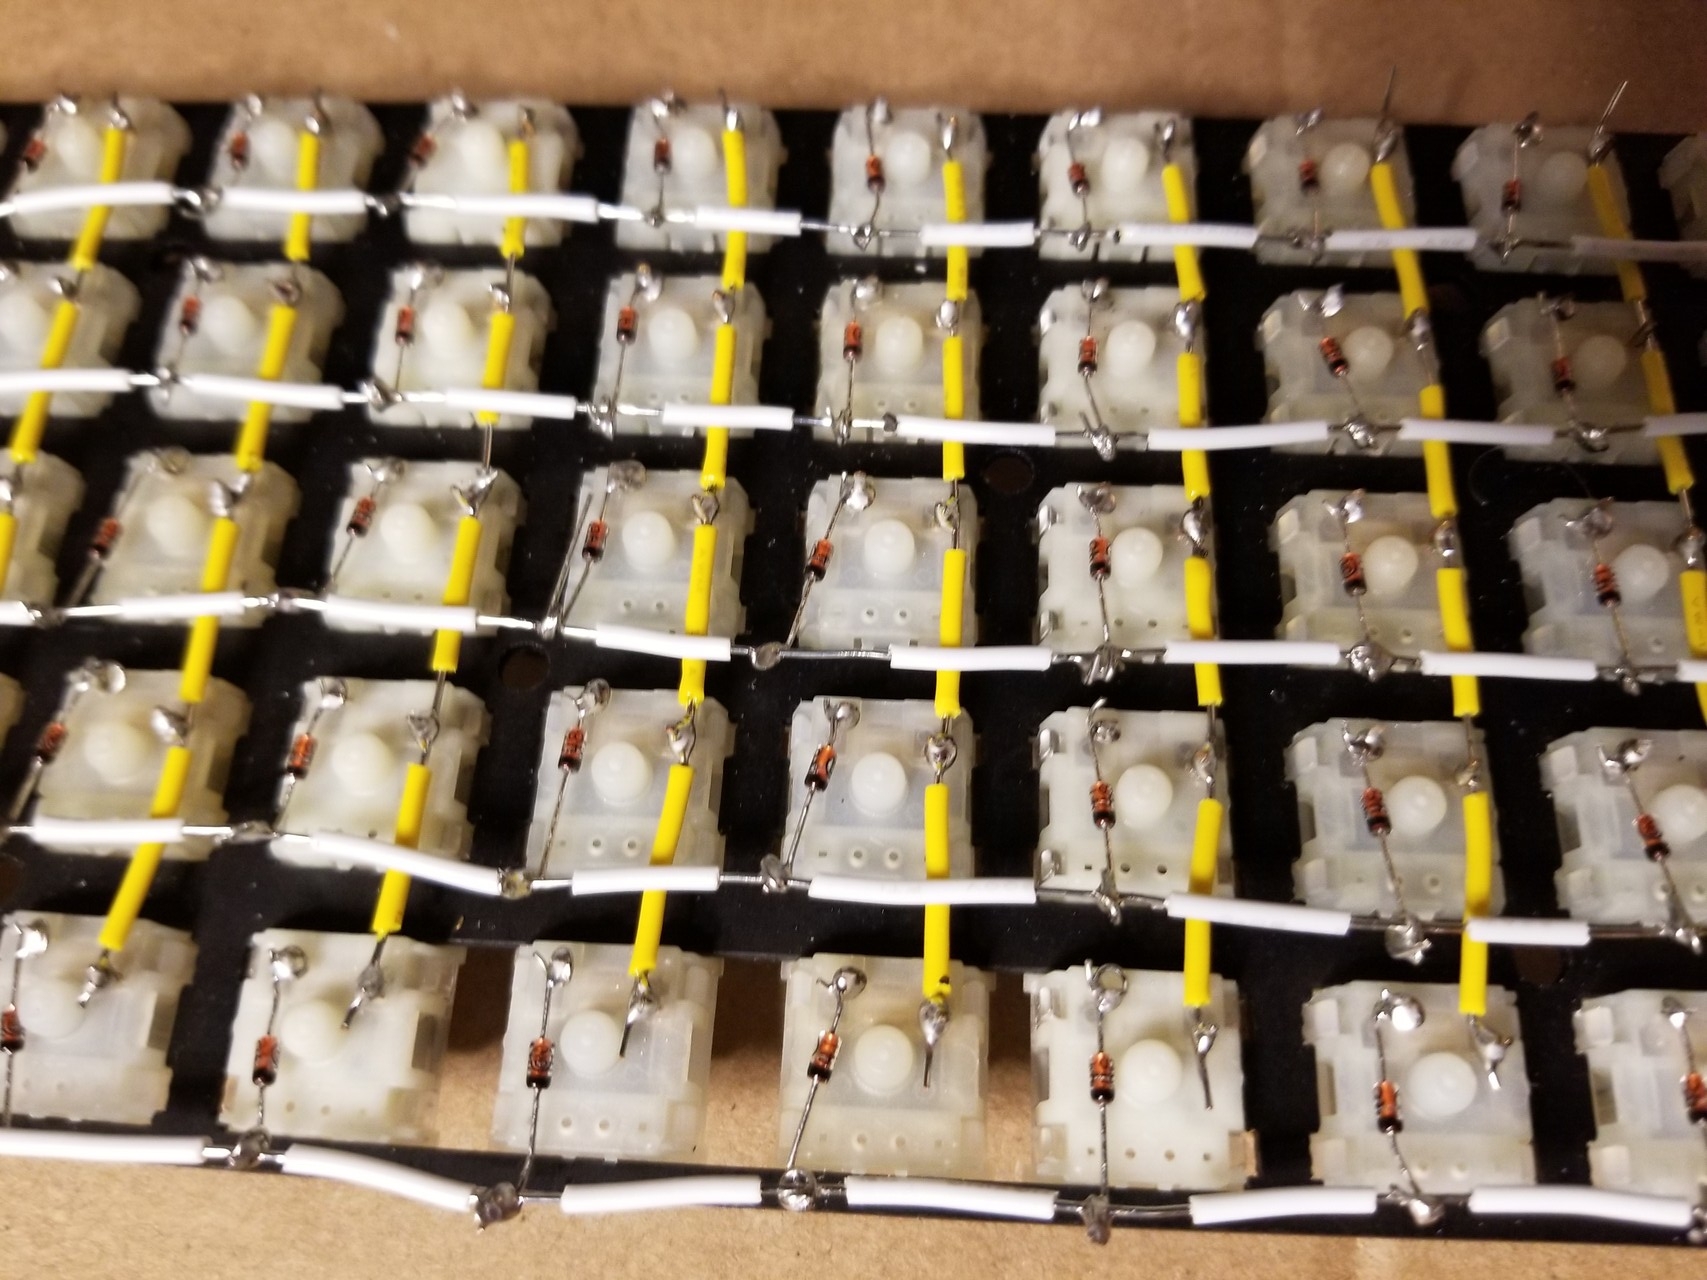
I wired the grid, starting with the rows. Some people like to solder the diode legs directly together, leaving a bare metal row. I prefer to attach them to an insulated wire. I figure less bare wire is better.
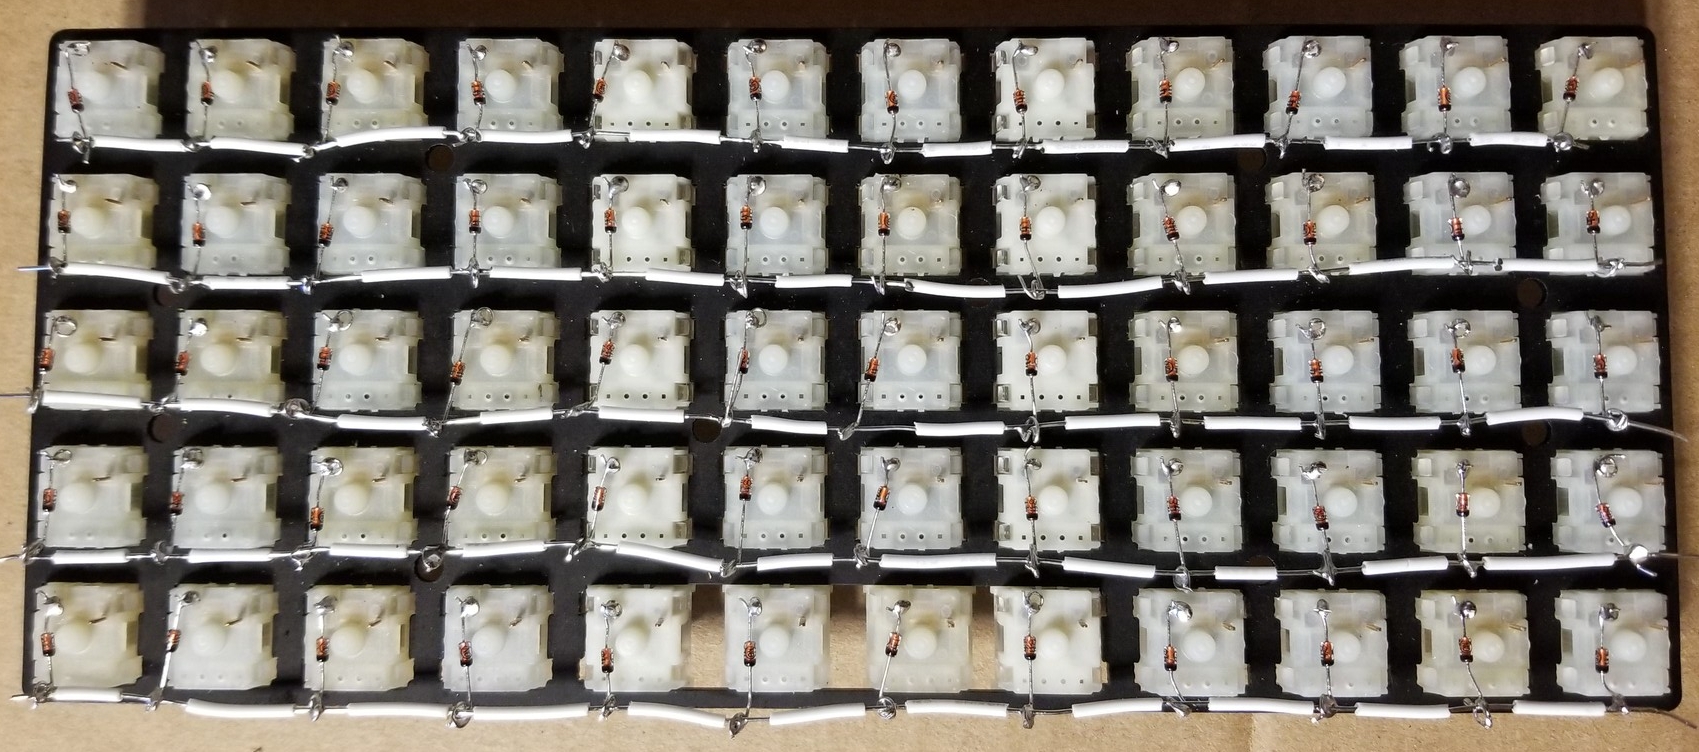
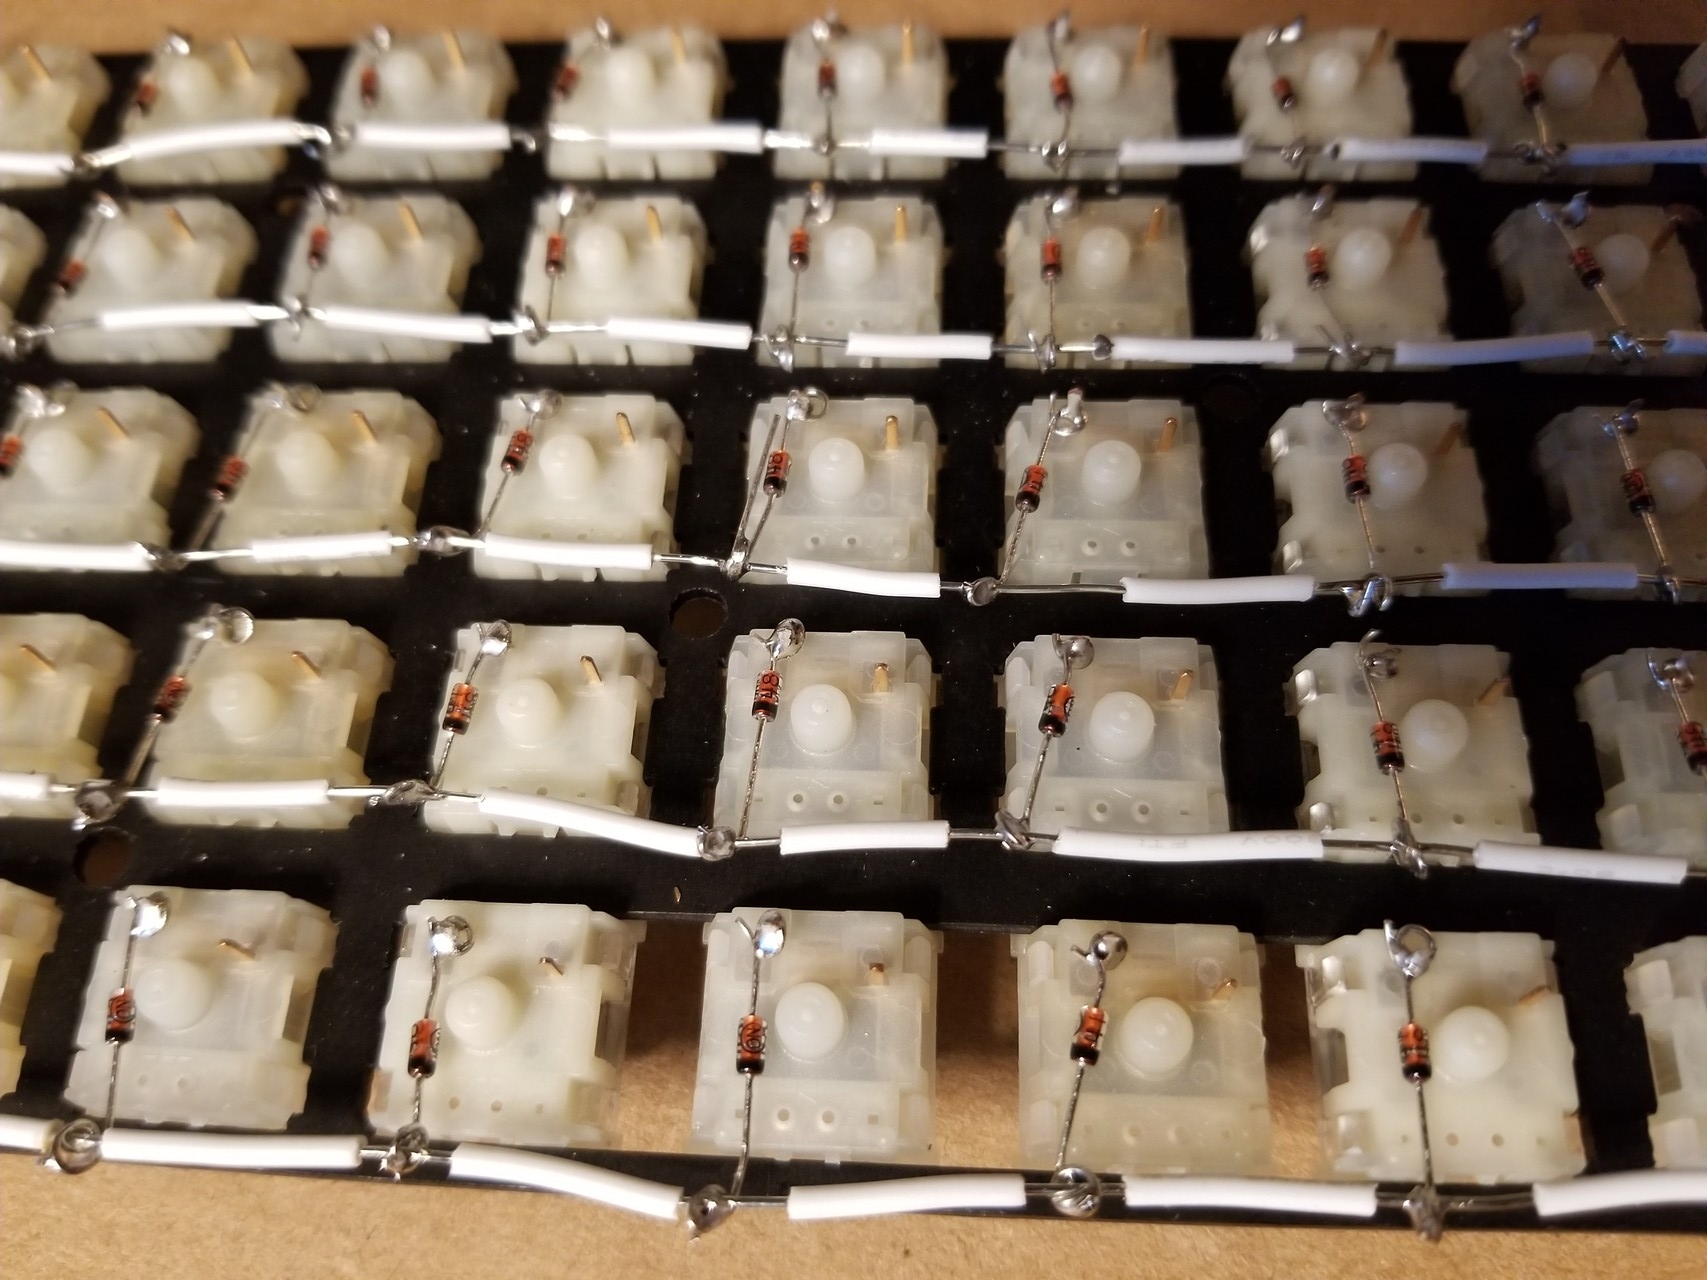
After the rows, I tackle the columns.
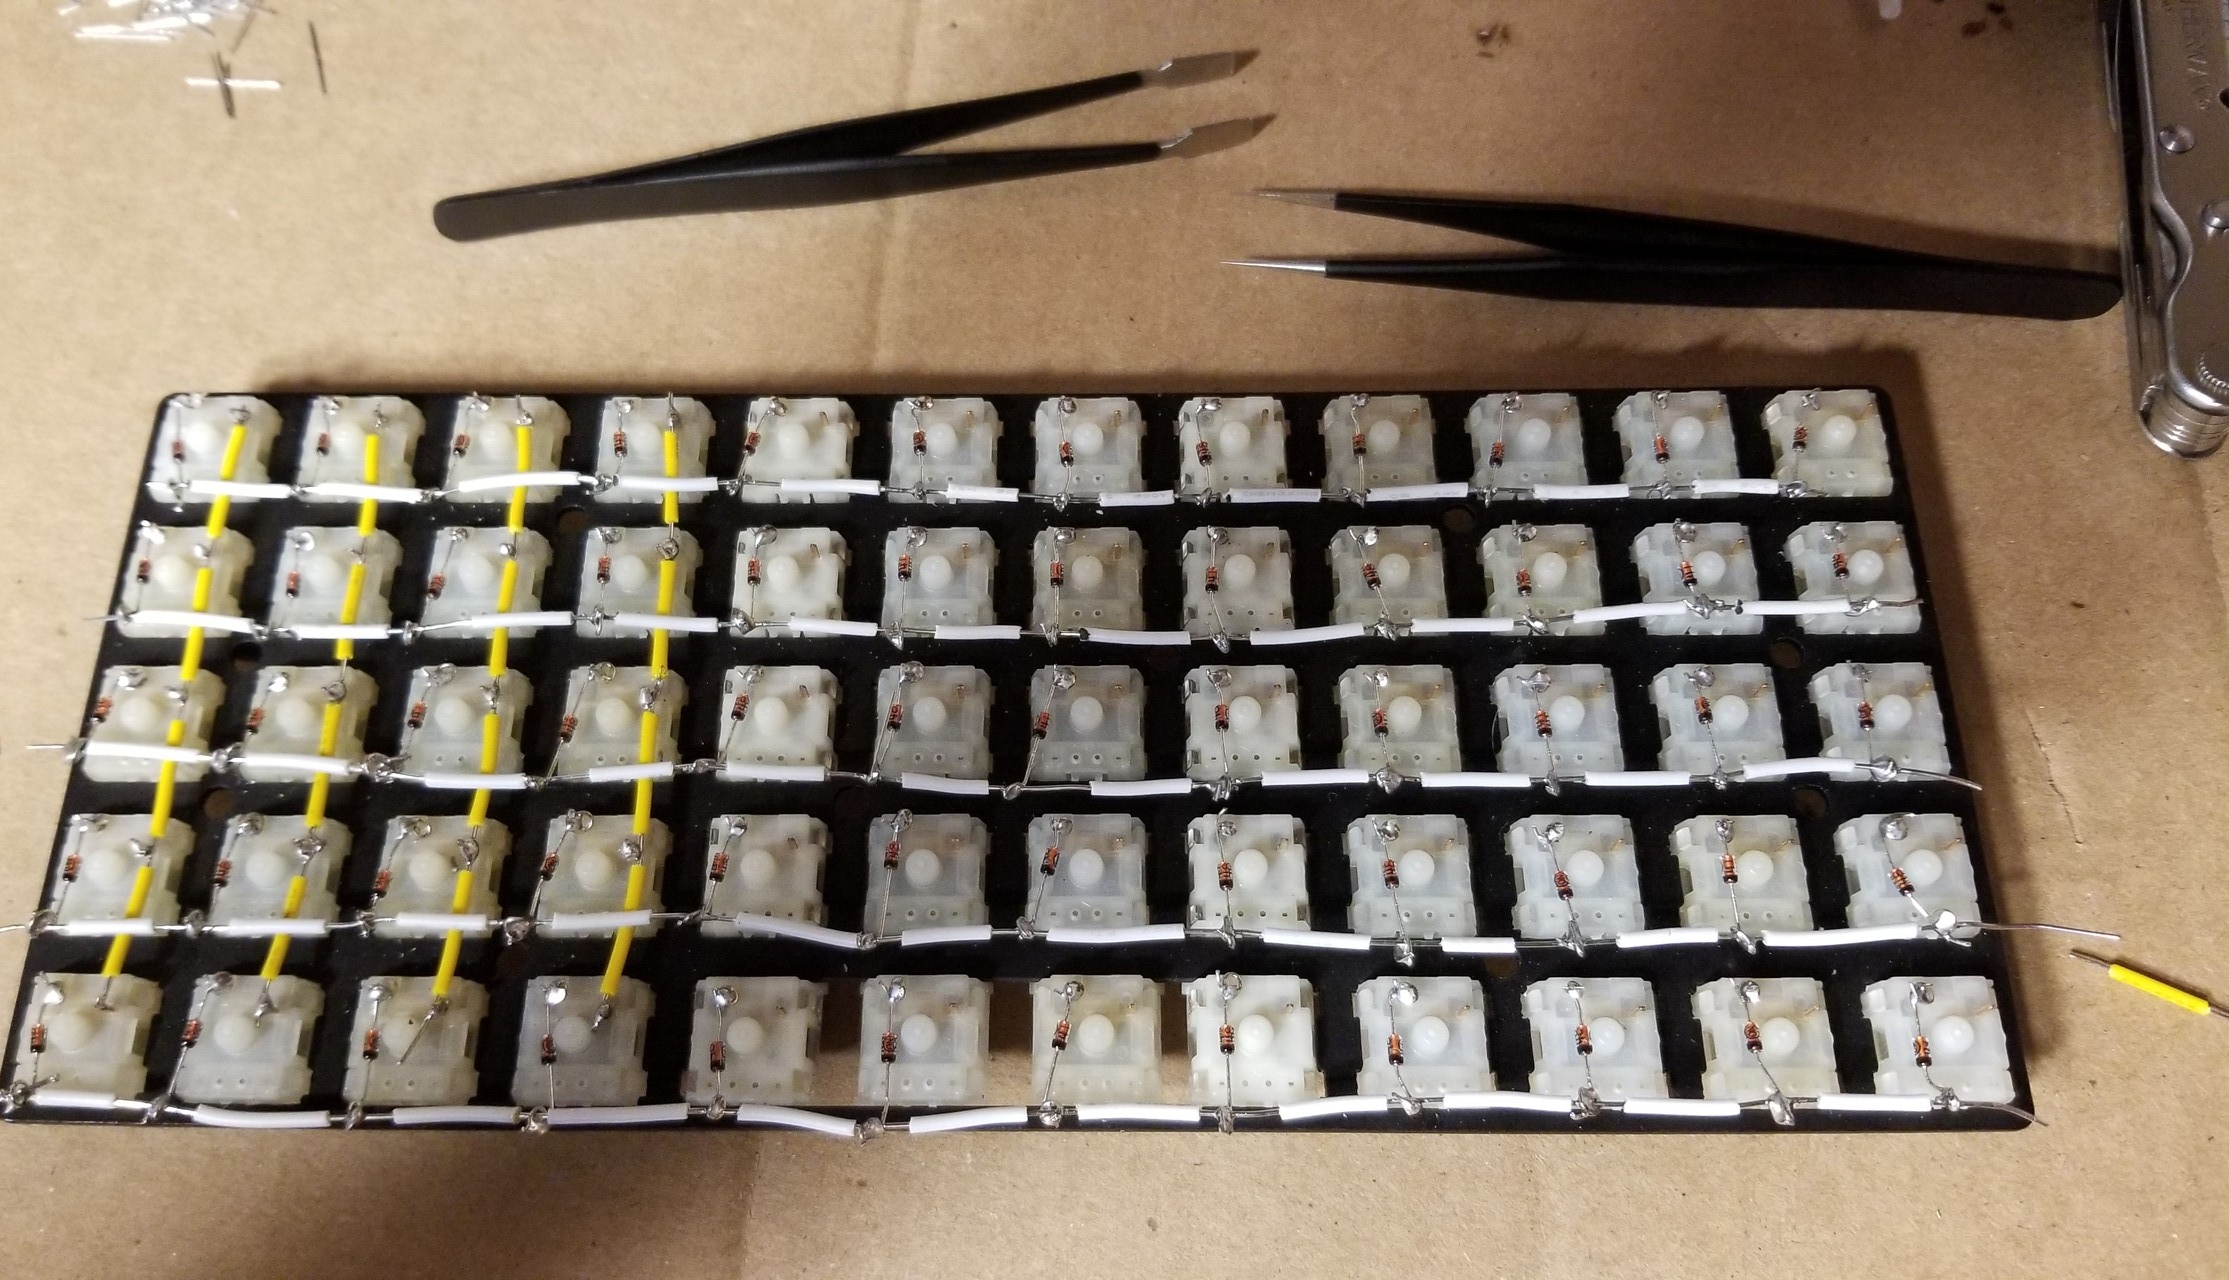
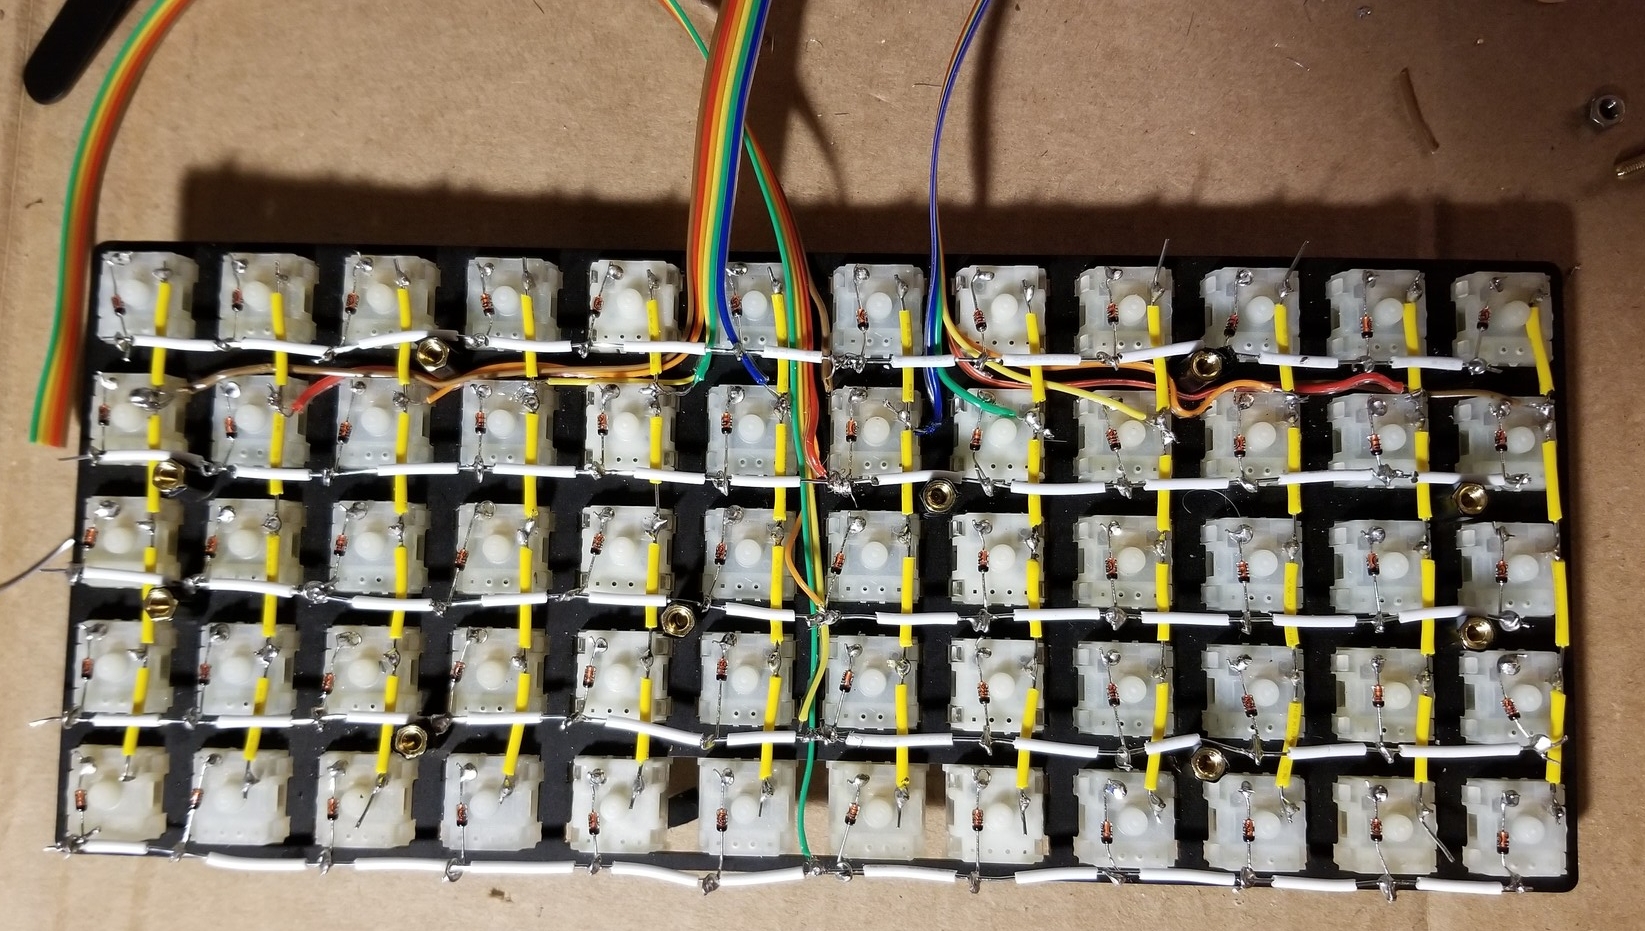
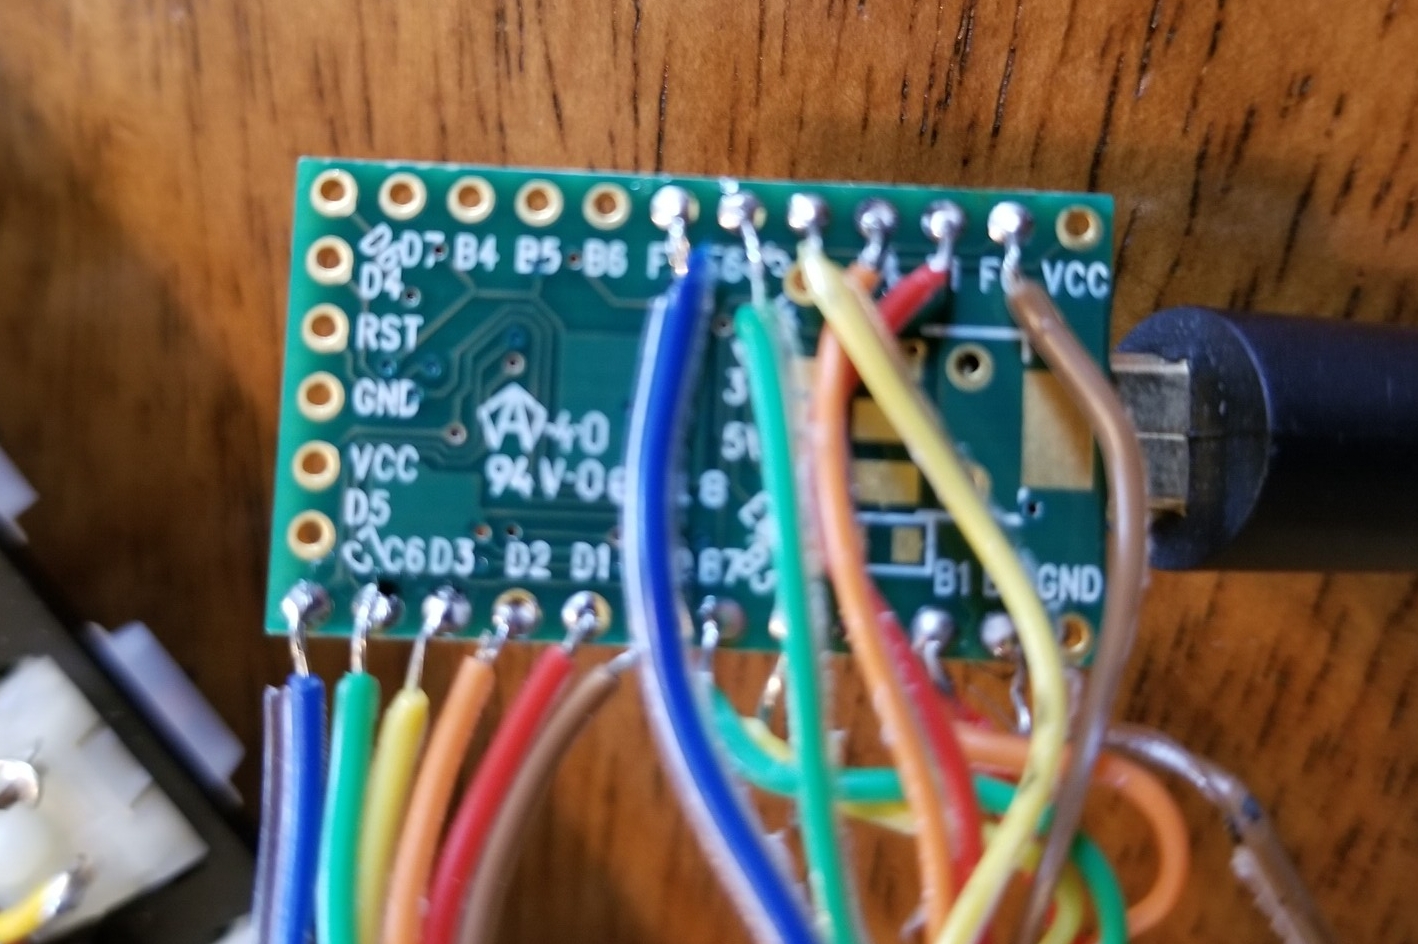
Once the grid was soldered, I used ribbon cable to connect the rows and columns to the Teensy. The thinner wires make it easier to snake through the underside of the board, and colors make for easier tracking. I do have a minor regret here. At the solder points I found the thinner ribbon cable to be a bit of a pain. To be fair, it worked fine and often choices are about tradeoffs; but next time I’ll probably use something other than the thin ribbon cable.
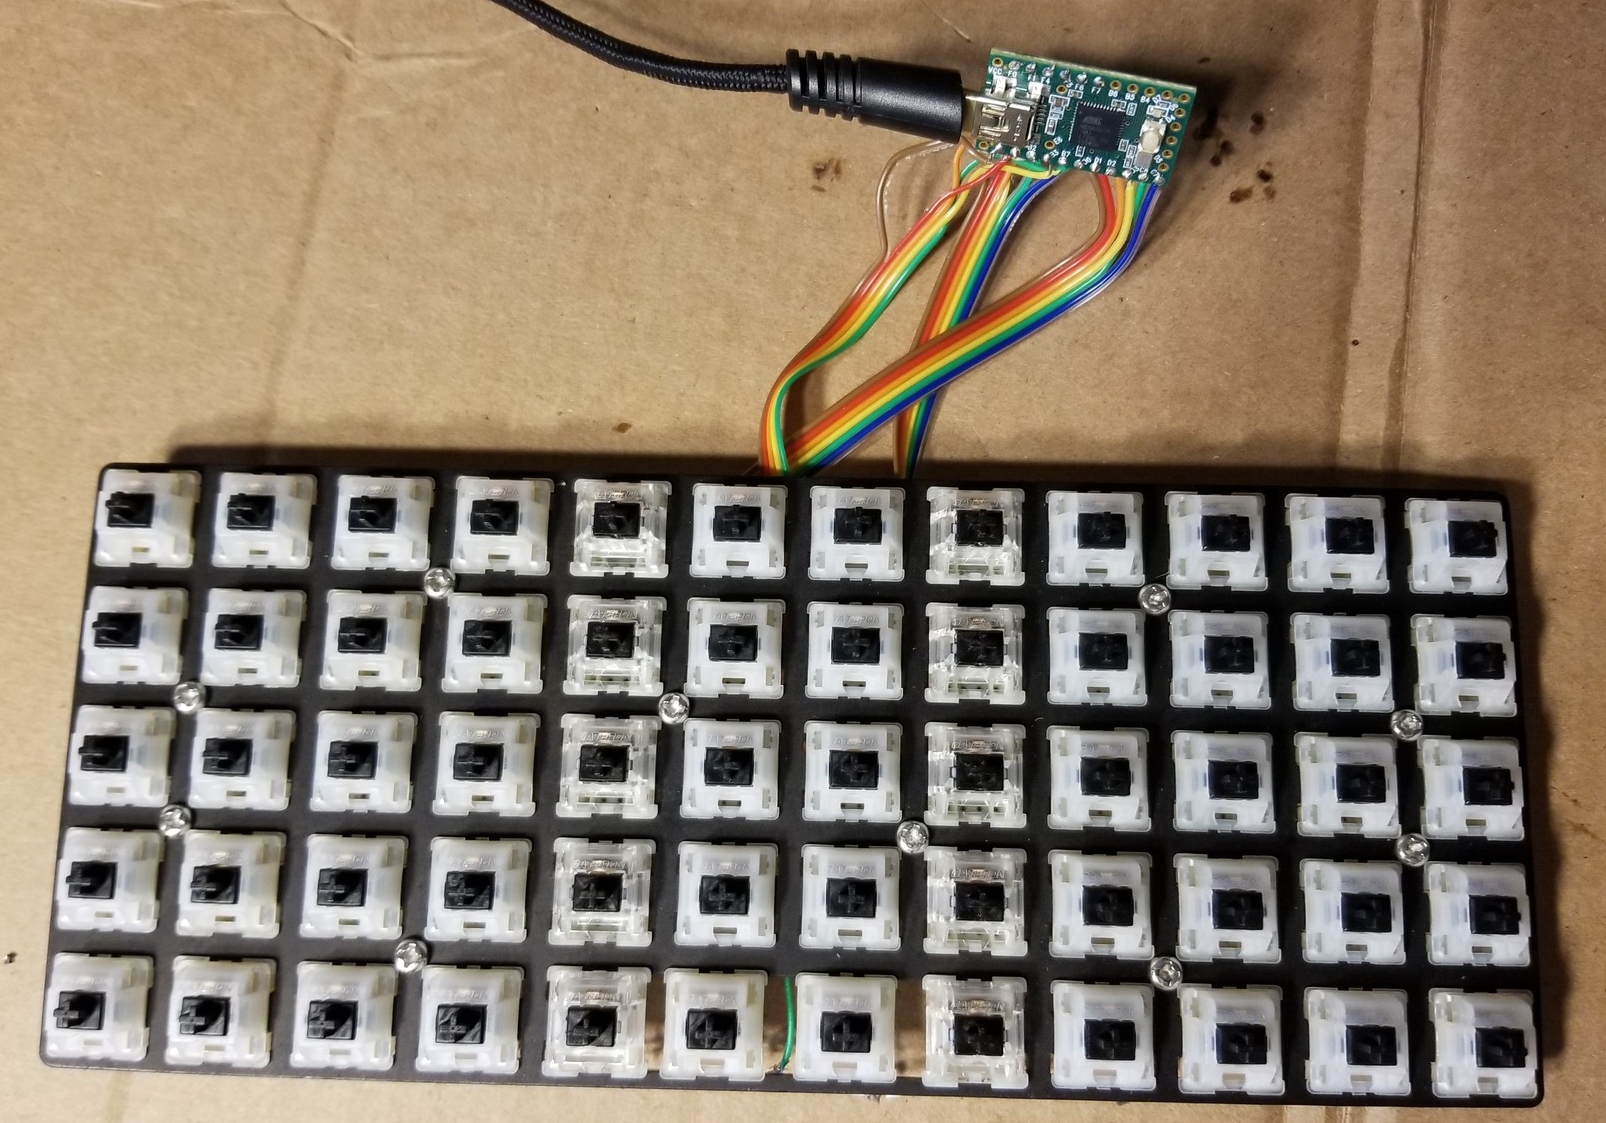
All wired up, its time to switch over to QMK. They have a pretty good guide on how to setup a custom firmware. Once I got myself oriented to the process, it wasn’t too bad to get a new firmware up and running.
Once flashed, the keyboard is all functional and good to go. At this point I’m still waiting on putting a custom case together, but that is a whole other project I have in mind. Until then the keyboard works as desired, and its an enjoyable addition to my collection.
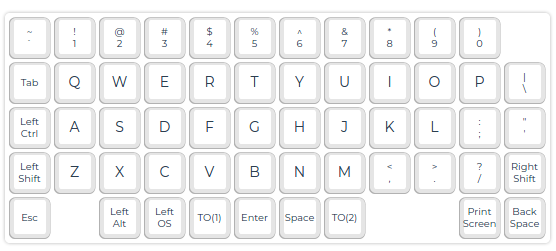
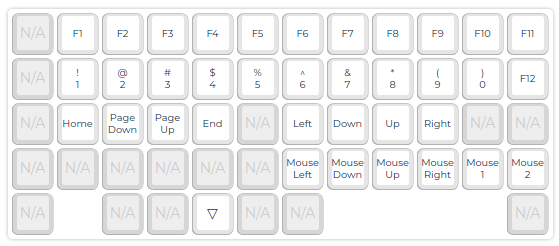
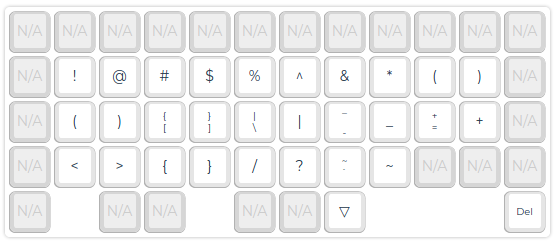
The below is the keyboard layout. This is also what I use on my Nyquist. I’ve found Esc and Backspace on the bottom row works really well. I treat layer 1 mostly as a movement and number layer. Layer 2 is a symbols layer, primarily focused on developer ergonomics. I’m intrigued by the Planck format (one less row). With this in mind, I make a conscious effort to compress the key space without sacrificing logical grouping and positional relationships. It just makes the layout easier to remember.
As a final note, for anyone considering hand wiring a keyboard but unsure if they can do it. I say go for it. The process really isn’t as bad as you might think and its fun journey. Until next time.